
Chapter Fourteen:
The Suneate
Design
Suneate Body

The earliest suneate were three-plate greaves with no protection for the knee. In around the twelfth century, knee guards started to appear. These kneeguards, like the suneate themselves, were of steel or solidly lacquered leather. Later they came to be made of brigandine.
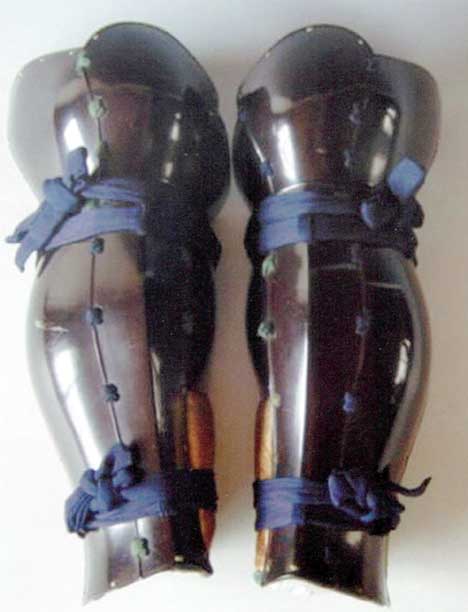
The body of the suneate originally was leg-fitting plates, but those of the sixteenth century were either fitted plates, a style called tsubo (“tube”) suneate, or splinted (shino suneate) like those used on the foreams of kote. Small sections of mail were often used to span the spaces between shino.
The plates or splints on the inside of the leg are only half length; the lower half, where the ankle would rub on the stirrup straps, was faced with a leather panel to prevent abrasion of those straps.
One ties the suneate to one’s shins by means of a pair of cords, one at the ankle and one under the knee.
Tateage

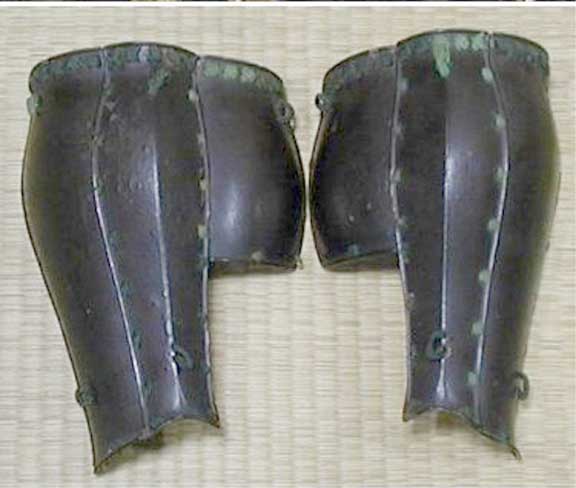
The knee guards—called tateage—were low, just tall enough to cover the patella, although there are surviving examples with hugely exaggerated extensions that covered half the thigh—a rider’s armour. By the sixteenth century, they were a more respectable and wieldy height.
Tateage were of two types: plate and fabric. The fabric models were kikkō, but more than one surviving model is fabric overlaid with European-style mail. The metal panels are of course better for SCA combat use, but even then I recommend some knee pads be worn under the armour clothing.
Fabric tateage were formed either from a single, wide panel of kikkō, or it was divided into three panels. For SCA use, I recommend three panels for the same reason that Sakakibara Kōzan did: one panel may jut open when the leg is bent, while three panels should hold closer to the leg. Still, kikkō isn’t really the best protection for your knees, no matter how spiff it may look. If you use kikkō, wear solid knee armour under your armour clothing.
The cheapest suneate had no tateage—these were made in the hundreds for the lowly ashigaru.
Construction
Measurements

The tateage should come to about an inch above your knee when you stand straight. You will need to wear padding or solid armour under it if you use kikkō. The body of the suneate should extend from just under your kneecap to the curve at the top of your foot (or, the curve at the top of whatever footgear you fight in). In the case of shino suneate, the armourer would sometimes go so far as to put a hinge on the central plate about an inch from the bottom to facilitate comfortable walking. This shouldn’t be necessary, but it’s a nice option to know about.
Plates
Use 18-gauge steel for the plates in your suneate. There’s no need to go any higher, but you may want to think about 16 or even 14 gauge if you are making very narrow splints and fight people who frequently hit low and hard. In SCA heavy combat, you shouldn’t have to worry about shin-shots, generally, but just to be on the safe side…
The protective metal shell or splints should wrap half to three-quarters the way around your shin. When you cut the plates or shino, keep that in mind. You can, if you wish, cut broader shino, or add to their number. I have seen suneate of anything from five broad splints up to 13 narrower ones. (That there will be an odd number goes without saying.)
Fabric
The fabric should be en suite with the kote and haidate. Make the fabric base to conform to the specifications in the chapter “Before Beginning.”
Cut the fabric wide enough so that, wearing whatever leg gear or armour pants you plan to wear, the edges overlap slightly in back. The height is from the top of your foot to the bottom of the patella.

Cut the tateage panels and do the brigandine work. If you are making tsubo suneate with a solid metal tateage, do not brigandine the cloth; you will still need the fabric section tateage to line the metal tateage, however. After the tateage panels are cut (and brigandined if appropriate), rim them with bias tape.
Lay down the backing fabric of the suneate, right-side up. Lay the tateage panel down on the backing material, face up, with the bottom edge of the panel even with the edge of the fabric. Lay the lining and then the foundation fabric on this, right-side down. Sew it all together 1/4" from the end. Flip the fabric over so that the panel extends from the top of the suneate body.

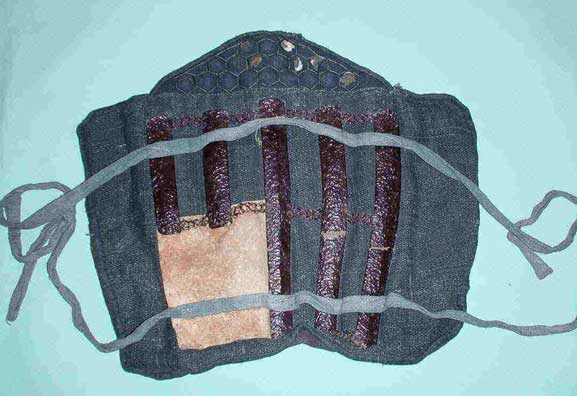
The illustration at left shows an rough approximation of a cutaway of one of the suneate. The side with the legend is the inside (the pale purple representing the lining fabric) while the other side is the outside (with the thick black line representing one of the plates).
Cut a panel of thin leather—about 4 oz.—that corresponds to the shape of the inside ankle section. It should be about one-third the width of the fabric, enough to cover the inside ankle when the fabric is wrapped around the shin. This leather is usually dark brown, black, or printed leather, although I’ve even seen leather panels covered in gold leaf. Stitch the panel in place before applying the bias tape to edge the suneate.
The bias tape can either encircle the entire suneate, in which case the tape begins at one side of the body of the suneate where the tateage panel fits in, or it can encircle the sides and bottom, leaving the top with the simple sewn closure it already has.
Cords

Six small loops of fabric—one on the outer-most plate at either side at the ankle and the inside of the knee, and two at the center of the suneate at the same horizontal levels—provide the run-throughs for the fabric braid that are used to tie the suneate to your leg. Alternately, you can dispense with the loops with and just stitch the braid right to the plate at those locations with simple, small cross-laces. This makes the cords permanent, so that they won’t come off and you can’t lose them. A good deal, in my opinion.
The cords should be long enough to wrap around your leg (at the ankle and under your knees) twice, and tie in front with a bow knot.
Shino suneate

The shino (or splint) suneate is the most common type, and there are many variations. The tateage are almost invariably kikkō.

The shino are formed in a similar manner to those of the kote (q.v.). They are also attached the same way—namely by being stitched to the underlying fabric and interspersed with sections of mail. You can give them a slight overlap (from the middle out) and attach the splints one to the other with a series of cross-laces instead, if you prefer. In this case, you’d have to use more or wider splints. This is possibly a better defensive armour than conventionally spaced shino suneate.
Note that the pattern for the shino on the left and right side of the suneate are identical, except you will have to cut all the shino on the inside the leg short (follow the dotted line in the pattern for the inner-side cuts). This is to allow the leather panel to cover the inner ankle instead of metal plates.
When all the shino have been cut, punched, formed, and painted, apply any mail panels you will use, or lace the shino together if it is your preferred style. Attach your tying cords or cord loops to the shino. Only now will you stitch the shino to the fabric, in the same manner you stitched the plates and mail to the kote.
Admire your handiwork. Put them on. Dance around.
Tsubo suneate

Tsubo suneate are tighter, form-fitting suneate made of three slightly overlapping plates. Steel tateage are used only with tsubo suneate, although kikkō may be used as well.

Cut the plates to the pattern provided, and punch or drill all the marked holes. Note that, like the shino suneate, the pattern for the inside leg is a mirror of the outside leg, although you have to cut it at the dotted line. Dish the plates to fit your calves, keeping left and right in order. The central plate often has a ventral ridge, which you may wish to make, or you can leave it a smooth curve.
After you have dished all the plates, paint them or have them powder-coated. When dried, lace them together with a series of cross-laces with the central plate overlapping both the side plates. Small hinges were sometimes used instead, but in the case of tsubo suneate laces were more common.

Attach the tying cords either by lacing them directly to the plates, or by attaching loops to guide the lacing. Put the half-tube aside and move on to the tateage.
If you’re making steel tateage, cut the plates to the pattern given. Dish them appropriately, putting a lip on the bottom edge (as per the illustration). The bottoms should be curved but flat in profile to fit behind the tops of the “tube” as they are laced into the suneate body.

You must make the foundation fabric for a tsubo suneate in a slightly different pattern. The bottom is more or less the same, but it follows the line of the plates, and instead of being cut straight to allow for the addition of a panel of brigandine tateage, the top forms the outline of the solid plate tateage, as it lines the whole suneate. This is assuming you are going to make a solid tateage. If you’re going with kikkō tateage, make the kikkō tateage according to the pattern above and attach them to the fabric base of the suneate as if you were going to make a shino suneate.
If you’re making a solid tateage, take the foundation fabric and force it into the half-tube that is the suneate body. Using an awl, open holes in the base fabric where the crosslaces go to attach the tateage to the suneate proper. This is your first step; lacing the foundation fabric to the tateage and the tateage to the suneate body all in one action. If you’re using kikkō, you still use the cross-laces here to attach the top of the fabric to the suneate tube.
Next, you should start at the bottom and with a series of thread or braid knots tie the fabric lining to the suneate, up one side (and along the top of the tateage if you’re using a solid one) and back down the other side. You should have several inches of the fabric sticking out at the back at either side, as it still wraps the leg as would a shino suneate.
You’re finished. Try them on.
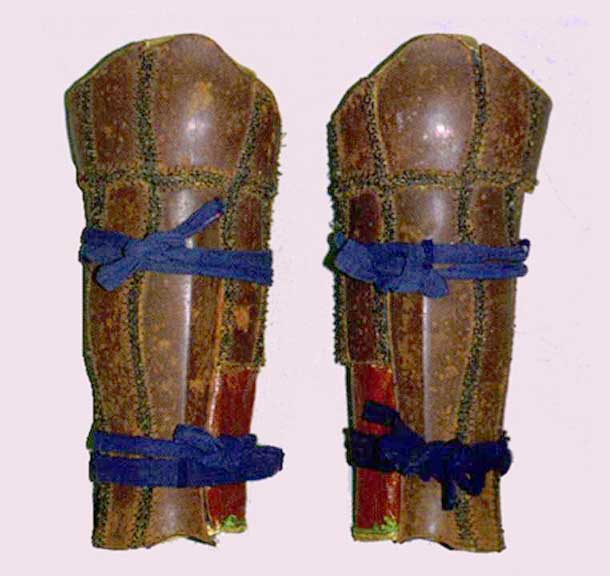
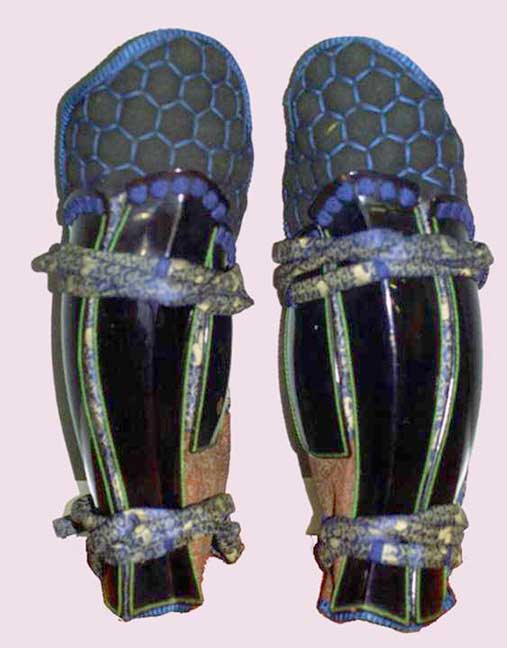
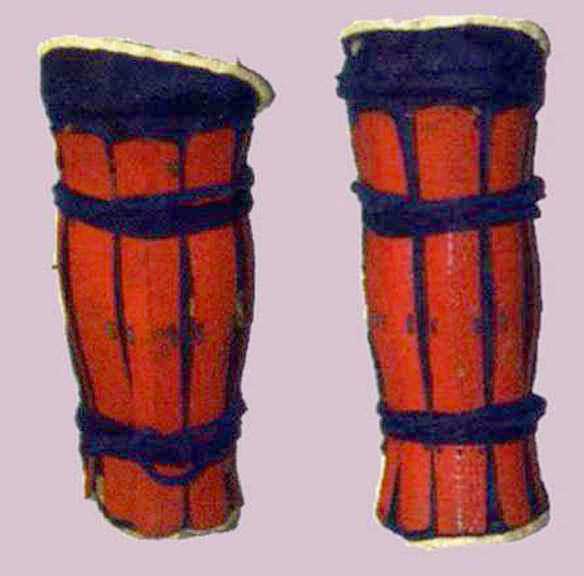
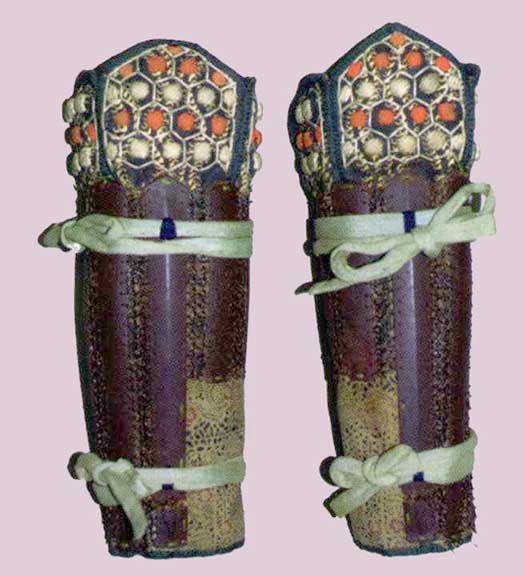
Suneate Gallery
The following graphics link to larger images (some are very large) which will pop up in a separate window so you can look at several suneate.