
Chapter Thirteen:
The Haidate
Design

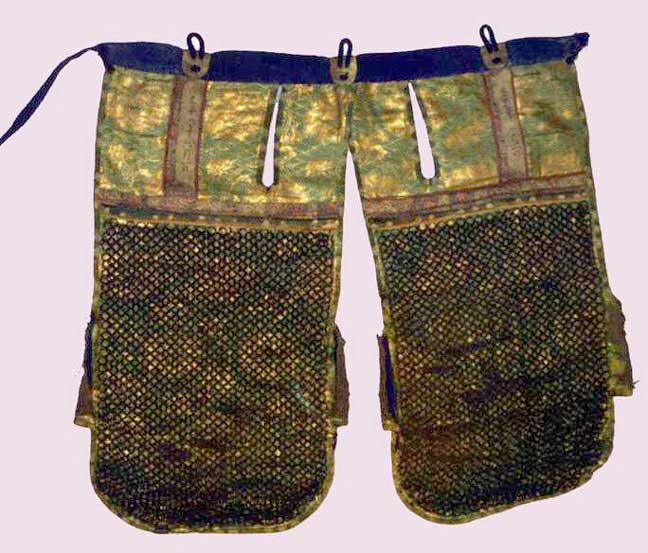
Haidate are a late occurrence in Japanese armour, not really arriving on the scene until around the thirteenth century. There were a few odd early styles that used hon kozane in an unconventional way, but I’m not going to go into those. For the curious, an image of such an early haidate appears below right. The haidate described here and for which I give directions are consistent with those of the sixteenth century.

Although you see haidate in all the art and films, and every suit comes complete with a set, historians tell us that more often than not the samurai didn’t wear their haidate, deeming them uncomfortable and likely to slow them down when on the run. Be that as it may, I would suggest, having once being the victim of a sword called Thigh-bane, that you make haidate and wear them when you fight. Your thighs will thank you. I’d even go so far as to suggest that you might want to wear “conventional” leg armour (cuisses with knees) under your hakama if you really want to protect your thighs and knees.

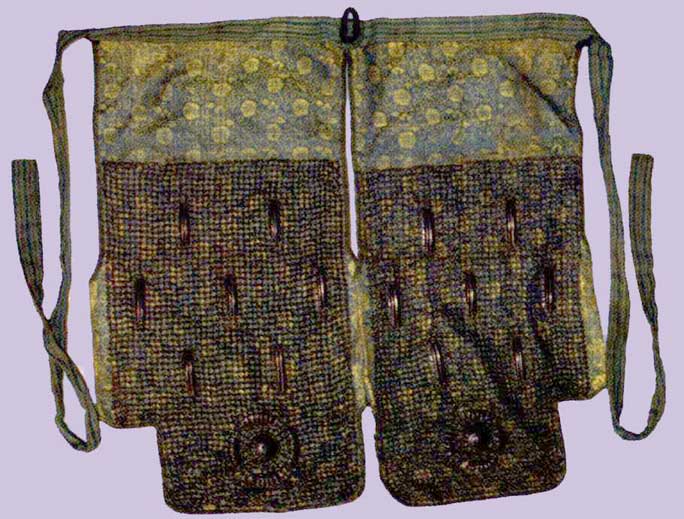
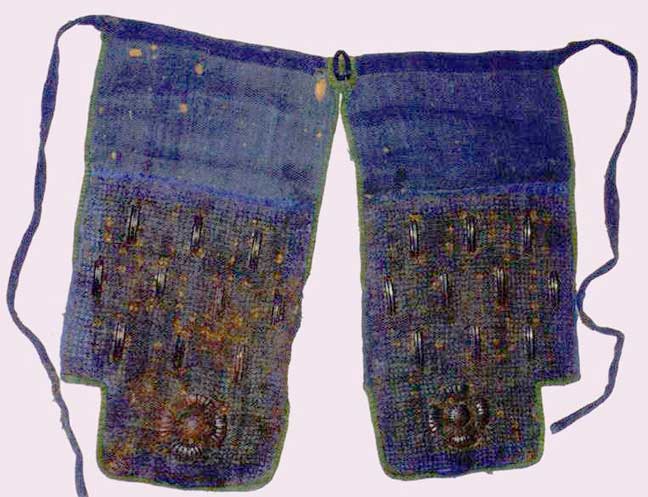
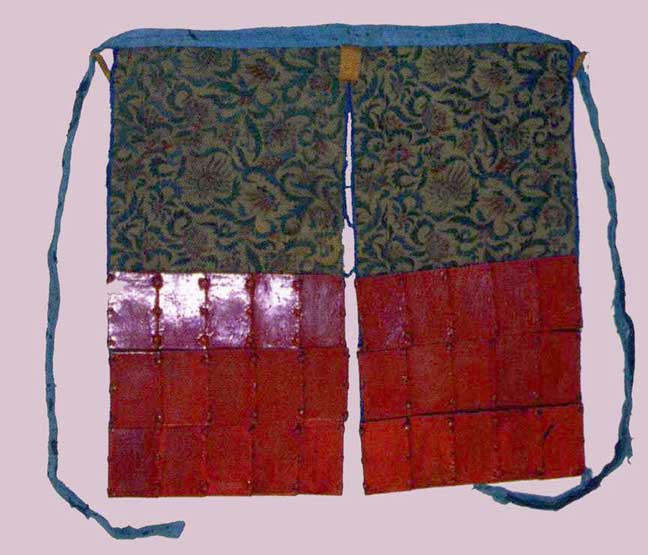
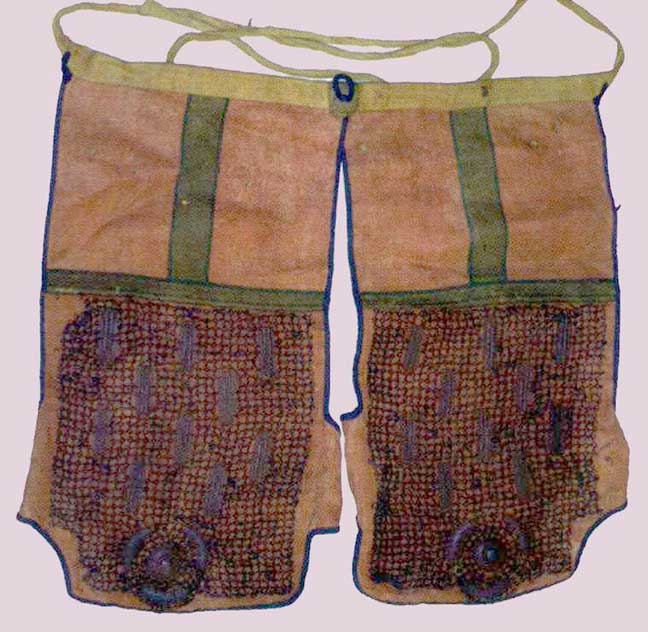
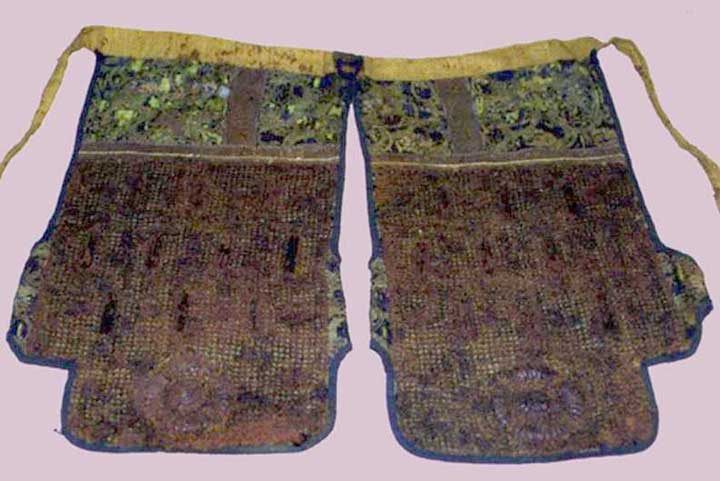
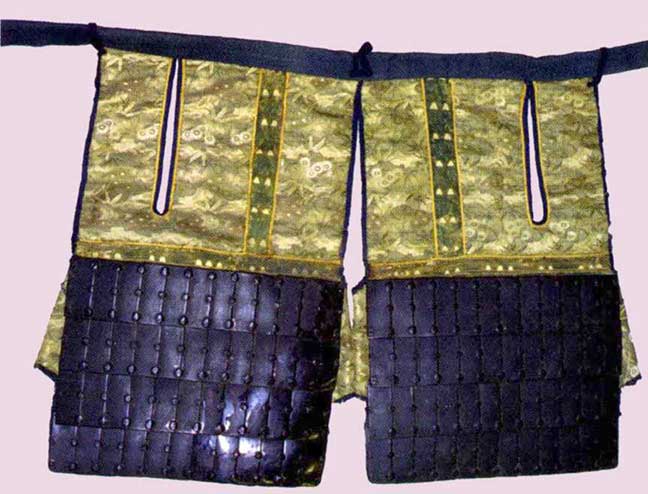
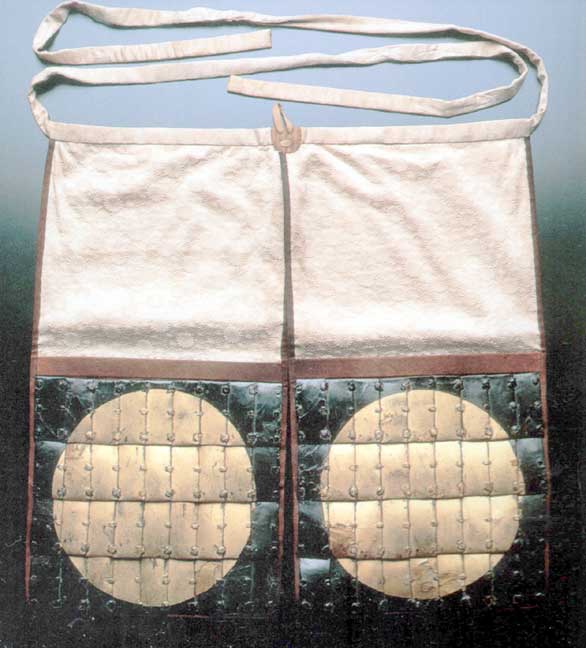
The largest percentage of haidate were made with small metal plates that were either slightly rectangular, or thinner with a rounded top and bottom. The latter were called goishi gashira iyozane. These scales were of a slightly different cut than what was termed iyo zane with the rest of the armour, however, and the hole pattern was distictive. This is because the haidate scales overlap side by side only slightly (as with conventional iyo zane) but are laced one to the other with small cross laces, and there is no suspensory lacing between rows of scales. These scales, when so made, are called kawara, or “tiles” after their resemblance to Japanese roofing tiles. For this reason, haidate so made are called kawara haidate. Just to mess with our minds, the Japanese armourers decided that the term iyo haidate would refer to those other haidate made of small, flat rectangular plates of about 1 1/2" x 2" rather than those made of iyo zane. Go figure.
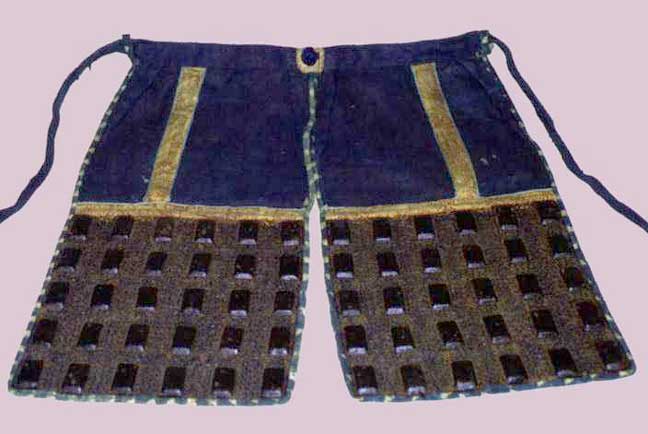
A few haidate, such as those depicted above, left, were made to be worn almost as pants—consider them armoured short hakama.
Construction
This is a really small piece of the armour, but considering all the different elements, it is the one you have to spend more time thinking about. As you work on the fabric section, you have to keep in mind the measurements of the armoured section; and as you work on the armoured section, you have to keep in mind the measurements of the fabric section. It’s a bear, but you can do it if you read all through the directions once or twice, look at a half dozen pictures of haidate, and only then start making your plans.
Plates
Regardless of whether you make iyo or kawara haidate, the plates can be metal or leather (or, yes, of plastic). If leather, cuir builli is a good way to go if you must. Think back to what I said about making kozane out of leather, though, and hold it in mind. If metal, 18-gauge is good, but 16 is better. All the plates for the haidate will be identical in shape and size; there are no edge scales or half scales. That, at least, is easier to deal with.

Measure your waist and divide by four. Add 3" to this figure. This is the width of each one of your two panels. This is also your target width for each row of scales (whether iyo or kawara). We’ll call this figure “W.” Now measure the distance from your navel to the top of your patella. Divide that measurement by two. This figure, which we’ll call “H,” is the vertical measurment of your armoured section. For now, ignore the other measurements displayed at left. H and W are what matters for the armoured section.

The kawara should be cut and punched per the pattern provided (although you can make them as narrow as 1/2"), then curved and dished according to the accompanying illustration. The rectangular plate is for an iyo haidate, while the other is for a kawara haidate. The illustration shows the scales in actual size.
If you’re using cuir bouilli leather, use a wooden form to mold the leather as it dries. There is no set number of kawara per row, as you need enough to reach W. If you show up about half a kawara short of W, that’s fine; a slight underlap of fabric is acceptable. (Alternately, since you're still in the planning stages, you can just go ahead and add that extra full scale and increase the fabric panel that width or reduce the fabric panels’ width to fit; the choice is yours.)
Four rows of kawara are common, but do what you need to reach H. If you need to make the kawara taller, do so; alternately, you can reduce their size and increase the number per row and make five rows. Four rows of tall, fat kawara isn’t as aesthetically acceptable as five rows of short, thin ones. It’s more work, but the rewards are greater.
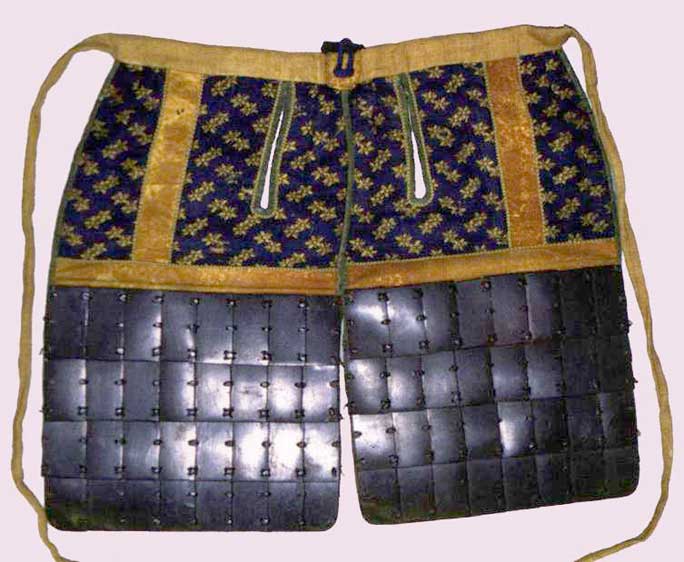
For iyo haidate, cut plates so that you will have eight to twelve per row, to the width W, and four or five rows to H (don’t forget to allow for 3/16" overlaps when you measure). These plates are flat, so there is no need for dishing or forming. Do not go below 1" in width for your plates, as they won’t look right at those proportions. This is the one where you want a broader, flatter surface, although even period armourers felt that excessively broad iyo (say, beyond 2") looked “vulgar.” Remember that as a rule of thumb, larger plates in the haidate meant “cheaper” — and cheaper meant “lower ranking person.” The important thing to remember in the final measurements is that iyo are always rectangular — never square — and the long axis is vertical.

After cutting, punching, and forming all the plates, paint or finish them.
Note that there are pairs of holes at the top and bottom, but only a single hole on either side at the center. Punch holes according to the pattern, whether iyo or kawara. The plates are laced one to the other horizontally until you have reached your desired width. Note that you will have to differentiate between the row that is to be the top, and all the other rows. The top-most row of plates is laced normally, cross-laces top and bottom, with the middle row taking a straight horizontal lacing. At the edges, run the middle lacing out the hole and over the edge, tying it off behind the plate, and only give the top and bottom a single straight up-and-down braid (as shown in the illustration on the pattern sheet), tying off a knot behind the plate. On all the other rows, the top-most set of holes only gets a horizontal running braid through the bottom hole in the pair instead of cross-laces, in the same manner as the middle set of lacing. This is because the other holes are for the cording that will secure the row of scales to the fabric of the haidate.
Lay aside the finished rows of laced-up scales.
Fabric Section
The haidate, although armoured, is primarily a fabric garment. All the fabric construction methods used in the kote and suneate apply, as the fabric matches. The graphic above, with the measurements marked, shows the layout and dimensions for a haidate panel, and is described below.
There are two panels on the haidate: one for the left leg and one for the right. As they are mirror copies of each other, I will address only the construction of one (the right leg); repeat this for the left leg, switching “left” and “right” as appropriate. Remember that I am describing the construction of only one panel. Remember also that all fabric parts consist of a canvas lining, a facing fabric, and a backing. (You might even want to use two layers of canvas lining here for extra body, or include a layer or two of batting for padding — this latter would not be authentic, but would probably not be a bad idea for a combat armour.)
Many replica armours you see today have the armoured section surrounded by a narrow band of padded fabric. This is a post-Period affectation, so we will ignore it. Note also that not all Period haidate had ties or button-up straps behind the leg to secure the haidate in place. I will describe their construction, but it is up to you whether you use them. If you intend to fight in these haidate, however, I strongly recommend them.
To save you scrolling back and forth, I am repeating here the graphic showing measurements and layout. Measure your waist and divide by four. Add 3” to this figure. This is W, the width of your panel (and also the target width for each row of plates). Decide where you will wear the haidate: on your hips, or from your waist. If from your waist, measure the distance from your navel to the top of your patella. If you will wear it from your hips, measure from there (about 2” below your navel is probably average) to the top of your patella. This is the length of your panel, which we will call “L.” Obviously, the fabric section (the height of which we will call “F”) will be shorter than the armoured section if you wear it from the hip, and they will be about the same length if you wear it from the waist. Both models were common. When worn, ideally the armour starts at about your crotch level.
Cut out a set in all the fabric layers. Don't worry about a seam allowance, as the fabric is edged with bias tape; you cut to the exact measurements you made in the previous step. You may find it easier to pin all the fabric layers together to cut them all at once and the same size.
Make an incision down the inside of the panel 3" from the edge two-thirds-F in length. This is shown by the long, vertical solid line near the right edge in the pattern illustration above left. This is the muchisashi no ana(lit; “whip-thrusting hole,” supposedly so named as you can thrust your riding crop through it and it will stay in place. The muchisashi no ana is not a required feature — many haidate don’t have it — but it is a common feature. Some haidate also have the muchisashi no ana on the other (i.e., the outside) side of the panel.

Now set the backing fabric aside until you’re ready sew it all together.
You will need two 1 1/2"-wide printed leather strips, as well. These should be made according to the method described in the section on printed leather in the chapter “Before Beginning.” This is light-weight leather, only about 4 oz. or so in weight. One is F in length, and runs vertically from the top of the panel to the armour section, and is placed halfway between the vertical slit and the outside edge of the panel. The second is W in length and runs horizontally from edge to edge, the bottom placed along the top of H. The horizontal strip overlaps the vertical one. Note that the usual leather edging (the koberi) is only applied to the upper edge of the horizontal panel. These are called chikara gawa (lit. “strength leathers”) and give additional integral support to the haidate. Sew them down to the foundation and the lining layers, but not through the backing (which you should have set aside).

To make the securing straps, you have a choice of methods. If you are sure the haidate will fit around your legs with some room to spare, make the straps 1/2 W plus 3" for the overlap, which is fastened with a button. (Yes, a button. The Japanese used buttons—just rarely.) If you are making narrower haidate, measure instead the circumference of your calf at the meaty part. Subtract W from this measurement, divide that by two, and add 3" for the button overlap. (This method results in strapping wider than the fabric panel and is shown in the picture at left where the strap fits a larger circumference than simply doubling the width of the panel.) About 1 1/2" will be used for the actual overlap, while the remainder gets sewn into the body of the haidate.
Cut two strips—one for the left side, one for the right. These should taper from a width of 3" at the outside to 1 1/2" at the end. Run a stitch along the edge of the straps, then place them jutting out about midway along the edge of what will become the armoured section of the panel (i.e., about two-thirds down the length of the panel).
(If you wish, you can skip down to the assembly for the armouring section now, so that none of the various knots or stitches will show on the backing. When you’ve finished with the armouring, and all the plates and mail—if any—are secured to the foundation and lining, you can move continue here and put on the backing and so on. You won’t be able to remove the plates from the haidate, though, without completely dismantling them if you do this. You may want to wait to put on the plates until the backing is in place. It may not be as pretty, but it’s easier to care for, and no one sees the inside of your leg armour anyway.)
Take the backing fabric now and place it behind the lining, and behind the strapping. Be sure that the fastening straps are either between two layers of lining, or between the lining and the backing—not between the lining and the facing. Now run a stitch around the edge of the panel. This serves to both secure the various layers of the panel and to make the straps one with it.
Run a strip of bias tape down the left edge of the panel, around the left strap, along the bottom of the panel, up the right side and around the right strap, up to the right top edge. Don’t bother bias-taping the top, as this will be covered by the waist tie. Run bias tape along the inside of the vertical slit you’ve made in the panel.
Sew a button to the end of the left strap and sew in a corresponding buttonhole in the right strap.
Now you must make a fold in end of the panel. Note the illustration. Essentially, you are folding a vertical dart into the outside edge of the haidate, to a depth of about 3/4" (therefore reducing the length a full 1 1/2"). Put a small stitch into this fold to hold it in place until you can attach the tie.
Now, repeat this whole process for the other panel, only reversing it. (Don't make two right legs.) When you’re done, you’ll have a left and right panel.
Lay the panels down side by side with a 1"-1 1/2" overlap with the right leg panel over the left one.

Take some heavy fabric of a dark color complementing the foundation fabric (and preferably matching the ties on the suneate), and cut it 5" wide and of a length sufficient to encircle the body once all the way around and tie up in front (e.g., if your waist is 38", the length should be about 90"). Fold the strip once lengthwise down its middle, iron it down, then open it back up and fold the edges inside to the middle. Close the fold and iron it again. This quadruples its thickness.
Take note of where the middle of the tie is, and center that on the two panels, sandwiching them in the folds. Notice that the very edge of the left leg panel actually overlaps the right one by a fraction of an inch. This is just to make gapping unlikely. Pin it thoroughly in place. Turn in the ends of the tie and sew it closed. Now sew up the tie, starting with a long stitch along the bottom, catching the panels in the process.
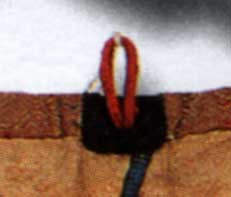
The last thing you have to do is cut a 4" x 2" strip of plain black or dark brown leather of about 4 or 5 oz. in weight. Punch two holes in it according to the pattern, and put a loop of braid through it, knotting the braid on the off-side of the leather. Fold the panel over the very center of the tie, so that it is top and center on the haidate, and the loop is facing forward. Sew it down through the tie and the inner corners of both panels. For a more secure fastening, you may want to put the leather panel on and then punch the holes and put in the loop.
This completes the fabric part of the haidate.
Assembly
Start with the bottom row of plates and begin “sewing” scales down right to left.

Lay the plate on the panel and fold the fabric out of the way except for where it overlaps the bottom-most row of lacing. Begin stitching it down by knotting a thread on the lacing behind the plate and running a needle through the entire body of the fabric, through the backing. Run this thread in and out through the haidate body and the lacing behind the bottom of the plates. This is precise work, so take your time. Tie it off between the body and the plate on the far side. Now bring up the fabric enough to reach the middle row of lacing, and repeat the process. The top is easy, as you tie a few stitches through the top holes through the fabric. This was the easy one.
The joint sections, where you have an overlap between rows, is the hard part. It’s done as a repetition of the bottom, but it’s just difficult to get the needle in past the other plate. Try running your thread through the top holes in the plate below first, and you’ll find it easier going.
Just repeat this process row by row. The only difference is the top-most plate, which gets stitched behind the lacing at the top instead of lacing down through the holes. (It would have to, as the top-most row is laced along the top.
Decoration
For kawara haidate, little decoration is possible. The most common method of spicing them up is to use alternating colors of lacing along the tiles, so that the top row may be white, the next red, the one below that yellow; then the next row of kawara repeats the pattern.
This is also commonly done with iyo haidate, although more often the tiles are lacquered in contrasting colors forming a checkerboard pattern, or in rows of one color, then another. The owner’s crest is sometimes lacquered into the plates in an overall pattern like a puzzle, so that when they are all laced together the mon is displayed.
Wearing a Haidate
Looking at the haidate, you might think that just tying the thing around your waist isn’t sufficient to hold it up, that it might slip forward and down.
Well, you’d be right.

Here’s a secret to wearing haidate that few people are aware of: that little loop in the front and center of the haidate holds it up. How? You have two options here.
Inside your dō at the very bottom of the front, you can attach a male frog. After you’ve put on the haidate and the dō, you reach under the dō and fasten the frog to the loop. Your dō is now holding the haidate up. Unfortunately, few dō survive with this feature. You also might not want that additional weight hanging from your shoulders. This brings us to the second option.
Samurai carried a few feet of spare cord with them for just this occasion. After donning the haidate, but before putting on the dō, run the cord through that loop, send one end up your body around your left side, and bring the other up your right front. Tie the ends at your shoulder. You’re now holding up the haidate by what amounts to makeshift suspenders. This is the only method useful for those haidate that omit the loop of fabric, as you can still run the cord between the left and right haidate panels.
Haidate Gallery
The following graphics link to larger images (some are very large) which will pop up in a separate window so you can look at several haidate.